Installing small solar panels typically involves the following steps:
1. Determine the installation location: Choose a location with sufficient sunlight throughout the day. Make sure there are no obstructions such as trees or buildings that block sunlight.
2. Gather the necessary tools and materials: You will need a drill, a suitable drill bit, screws or bolts, a wrench or screwdriver, a ladder or scaffolding (if you need to reach higher areas), and any other components specific to your installation system.
3. Choose an installation method: There are different methods for
installing small solar panels, depending on your specific situation. Here are some commonly used methods:
(1)
Roof installation structure: If you want to install solar panels on the roof, you can use roof mounting brackets or roof clamps specially designed for solar panels. These brackets are usually attached to the roof using screws or bolts. If you are unsure about the structural integrity of your roof, always consult a professional.
(2)
Pole Mounting structure: If you have an open space and want to mount your solar panels on poles or brackets, you can use a pole mounting kit. This usually involves using mounting clips or brackets to secure the solar panels to the pole.
(3)
Ground installation structure: Another option is to install solar panels on the ground. This method is suitable if your area is flat and gets good sun exposure. Ground installation usually includes posts or frames that hold the panels elevated.
4. Install the mounting bracket: After selecting the installation method, follow the instructions included with the mounting hardware to install it correctly. Make sure the mounting bracket is structurally sound and can support the weight of the solar panel.
5. Install the solar panel: Once the mounting hardware is in place, install the solar panel onto it. Most solar panels have pre-drilled holes in the frame for mounting. Use bolts, screws or clamps to secure the solar panels to the mounting structure.
6. Connect the wiring: After installing the solar panels, connect the wiring according to the manufacturer's instructions. This usually involves connecting the positive and negative leads of the solar panel to a charge controller or inverter to harness the electricity produced. Follow electrical safety guidelines and route cables carefully, neatly, and safely.
7. Test the system: After the solar panels are installed and wired, verify that the solar panels are working properly by checking the output voltage, current, and overall system performance. Check all connections and make sure the panel is producing power as expected. Monitor your solar panels regularly to make sure they are clean and free of any obstructions.
It's important to note that the exact steps may vary depending on the type of solar panel and the mounting hardware you have. Be sure to check the solar panel mounting system manufacturer's instructions for detailed guidance; they may have unique recommendations or requirements that should be for proper installation and use. If you are unsure about any aspect of the installation process, consider consulting a qualified professional or solar installer.

 English


 Ground Mounting System
 Roof Mounting System
 Carport Mounting System
 Farm Mounting System
 Easy Solar Kit
 Solar Tracking System
 Solar Inverter
 Solar Accessories
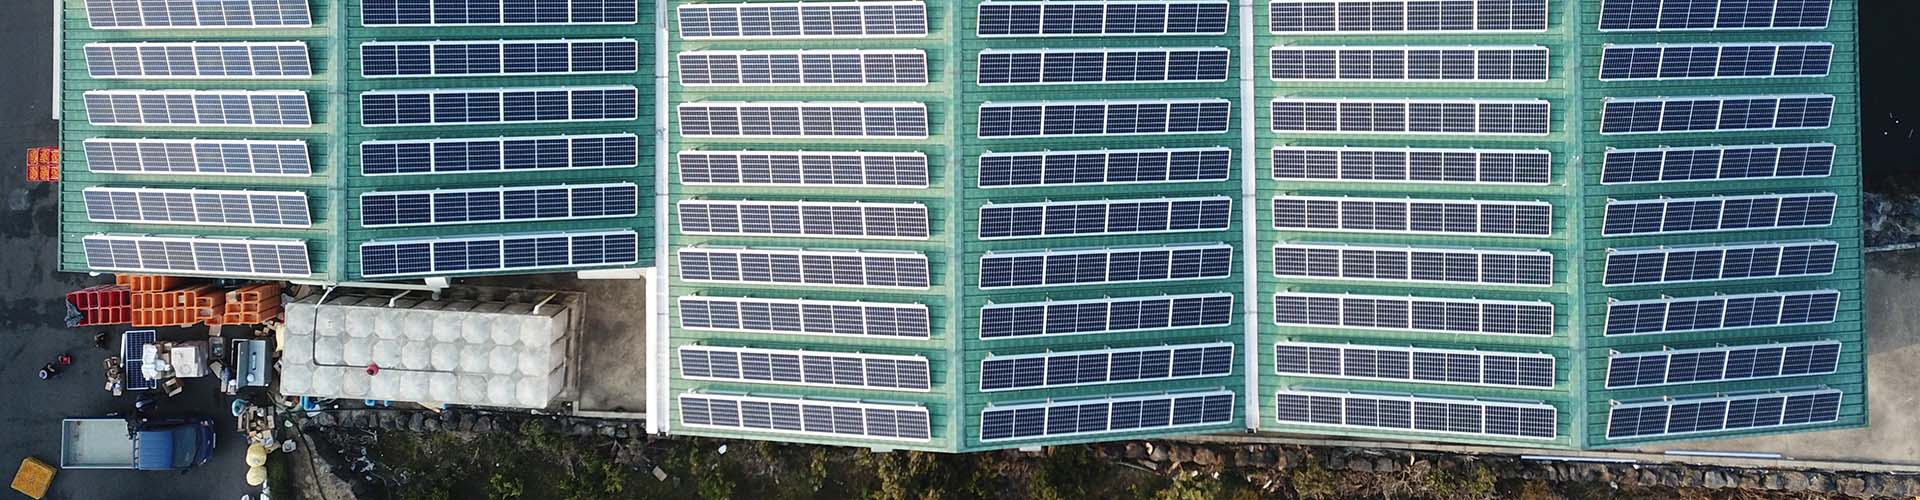
 RM502, Sihai Smart Zone, No.189, Fanghu West Road, Huli District, Xiamen, Fujian, China.