English


 Ground Mounting System
 Roof Mounting System
 Carport Mounting System
 Farm Mounting System
 Easy Solar Kit
 Solar Tracking System
 Solar Inverter
 Solar Accessories
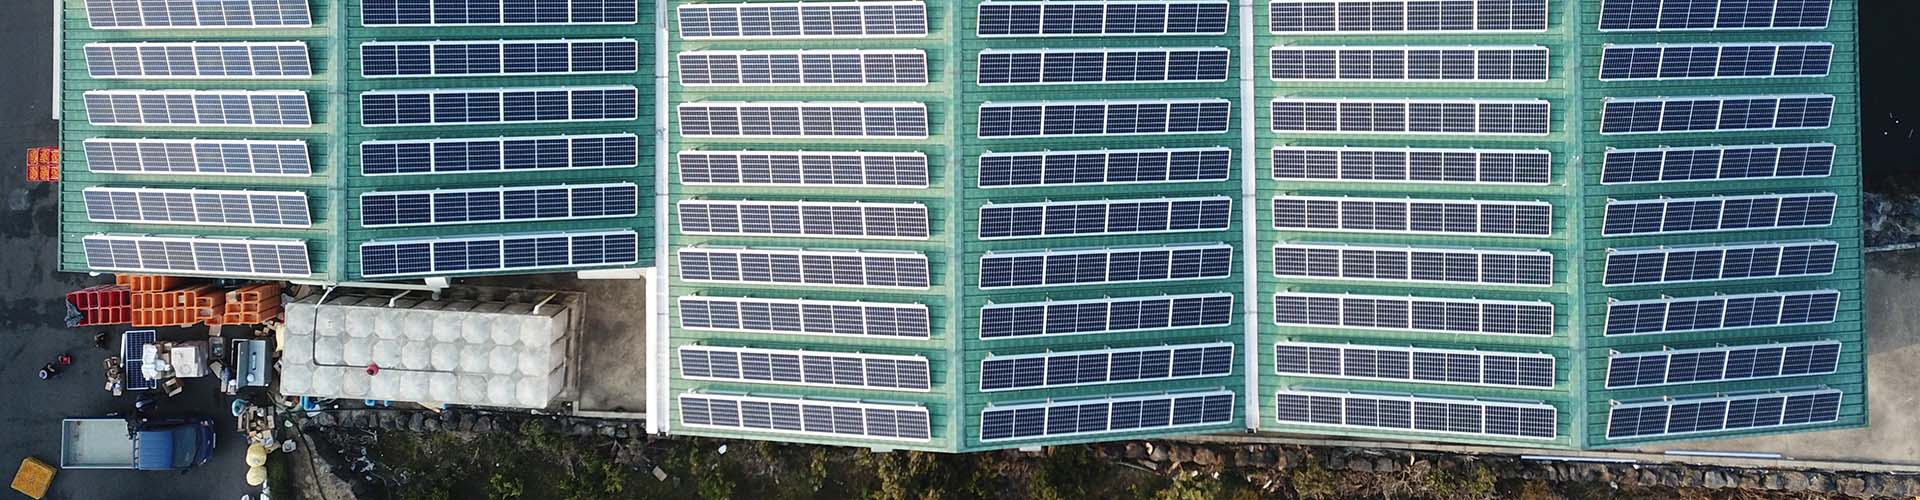
Guidelines for the use of photovoltaic cleaning robots-B30M2
The photovoltaic cleaning robot is simple and convenient to use. Let's learn about its usage guide below.
1.Supported usage scenarios
Notice:
2.1Check before use
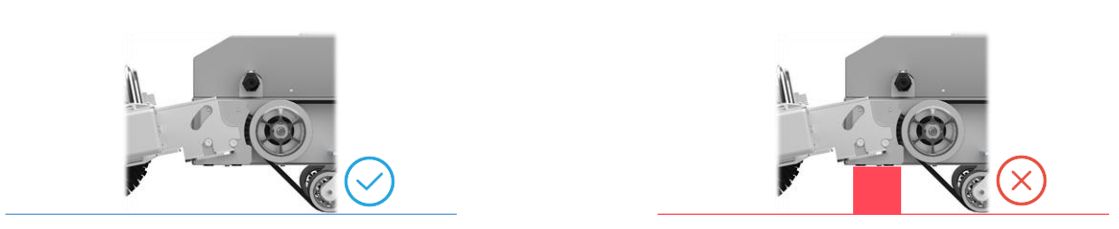
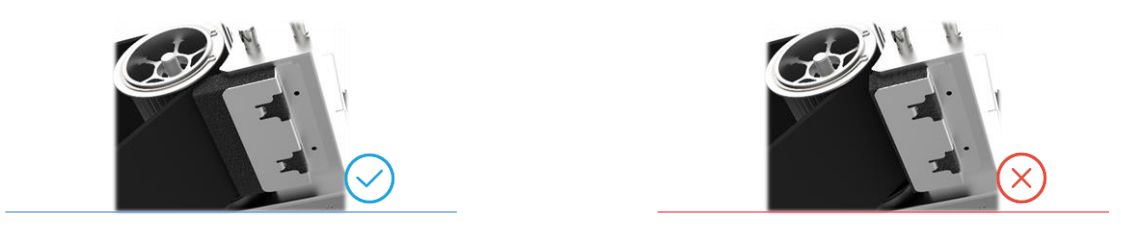
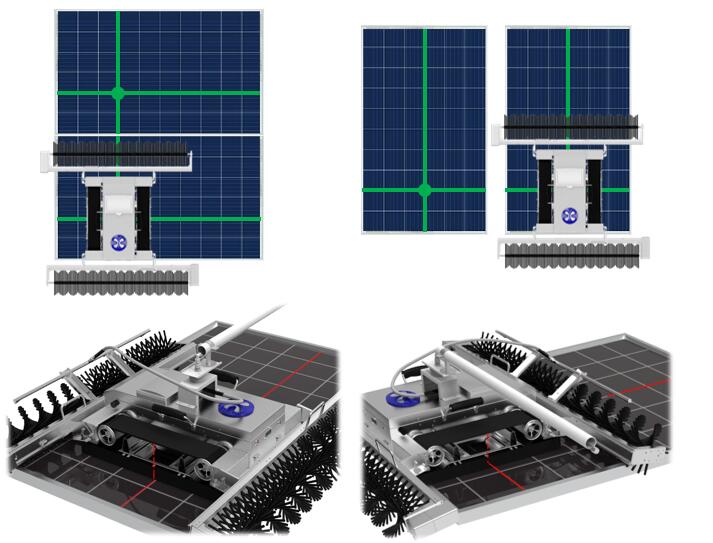
2.1.1Check the cleanliness of the track surface to prevent a significant reduction in grip. (It is forbidden to lift the suspended part of the upper part of the track to prevent the front and rear axles from being deformed and damaged)
2.1.2Check whether there is a foreign object under the anti-drop sensor to prevent the anti-drop sensor from being abnormal. (It is strictly forbidden to be squeezed by external force)
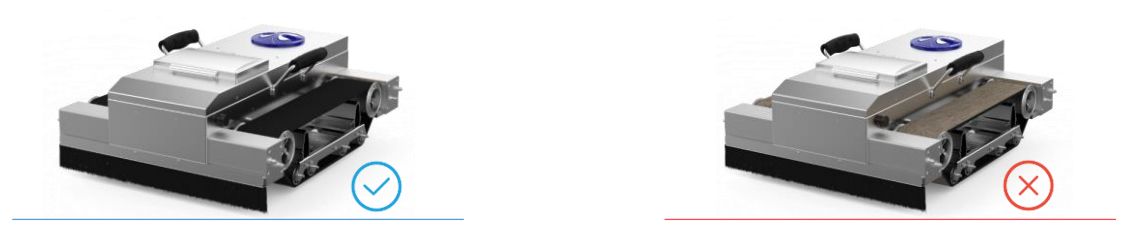
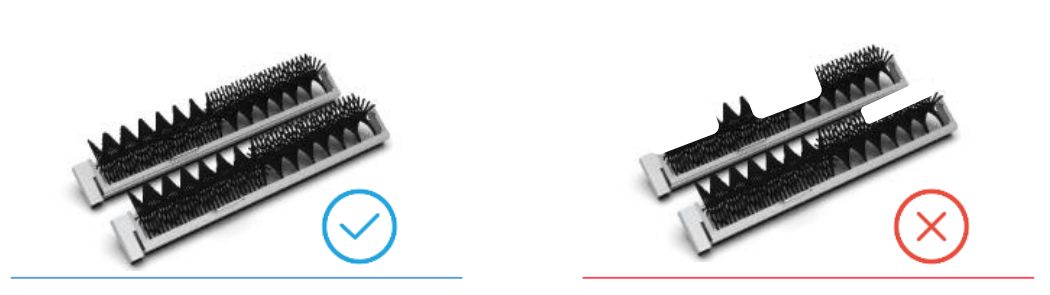
2.1.3Check the wastage of the self-cleaning pearl cotton, and observe whether the side of the self-cleaning pearl cotton is close to the track, so as to prevent the grip of the track from being greatly reduced.
2.1.4Check the cleanliness of the suction surface at the bottom of the suction cup of the central suction cup assembly and ensure that it is clean to prevent the grip force from being greatly reduced and affecting the safety of operation.

2.1.5Check the cleanliness of the camera lens of the exposure box and its box body, and whether the shading brush completely covers the projection plane area of the exposure box to prevent sunlight and dust from interfering with the camera.

2.1.6Check the type of roller brush assembly and whether it is deformed to prevent affecting the cleaning effect.
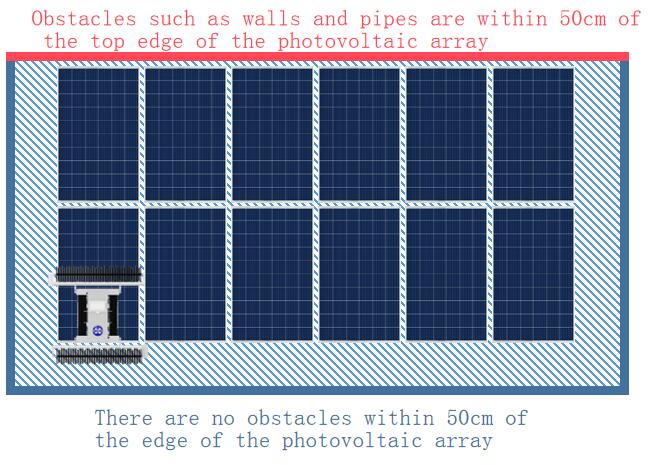
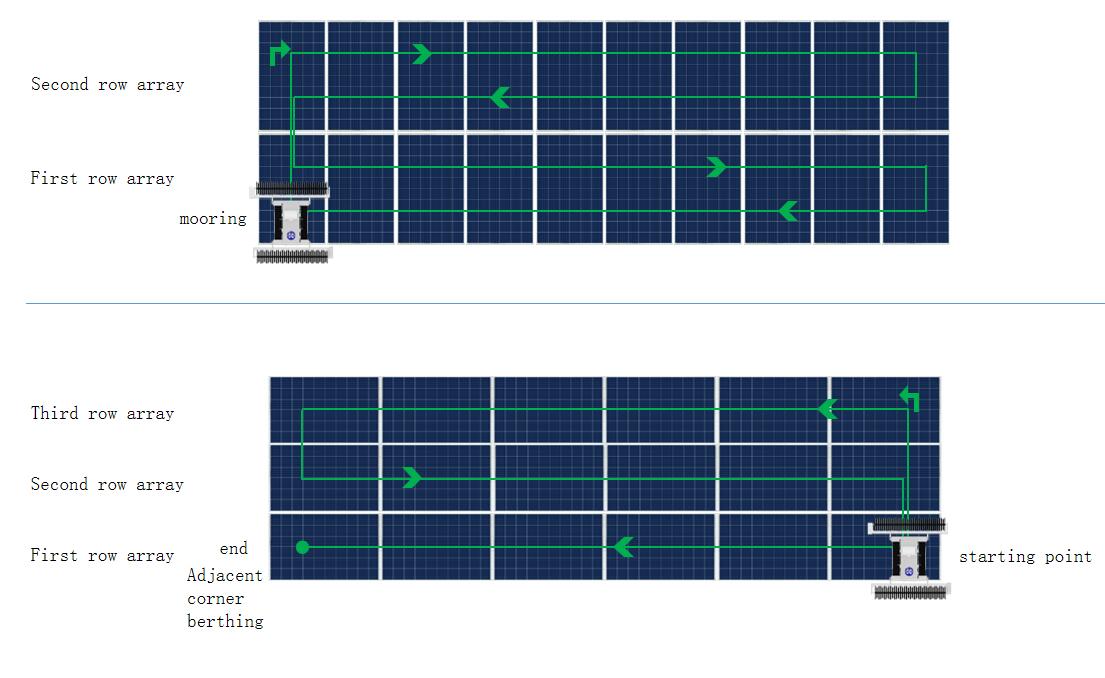
2.2Place selection
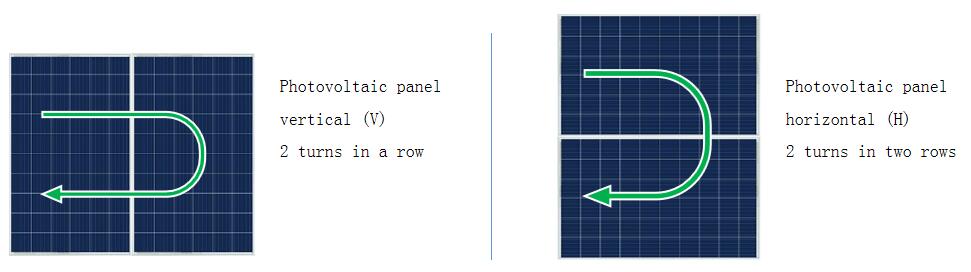
2.2.1(Number of Turns ) is equal to (Number of Turns per Row ) multiplied by ( Number of Relative Array Rows).
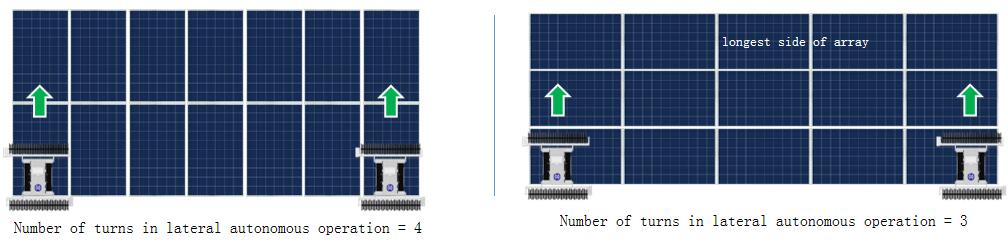
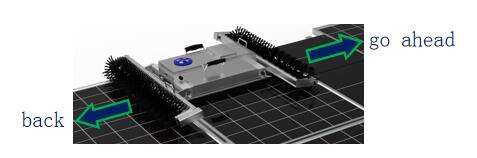
2.2.2Select the device facing the longest side (top) of the PV array as the starting point, so that the number of turns in the horizontal autonomous operation can be minimized and the efficiency can be maximized.
2.2.3Generally, the side that is convenient for handling and operating the equipment is used as the starting end, that is, the bottom end of the array.
2.3Boot device
2.3.1Power on
Press the power button to start the device, and when the first red light is off, the device is normal and enters the initialization state.

2.3.2Position calibration
Adjust the lateral center axis of the device to align with the line spacing between cells in the second row and the third row at the lower corner, and align the longitudinal center axis with the spacing line between the cells in the third and fourth columns at the lower corner.
*The left support plate of the synchronizing wheel has a hole position to indicate the center position, which can assist the position calibration.
2.3.3Start work
When the green light is always on, the red light is always off (the buzzer sounds once), and the initialization is successful (about 22s), you can press the start/standby button to make the device start working independently.

2.4Functional application
2.4.1Autonomous work
After the activation and identification of the scene is completed, climb up to the top of the photovoltaic array independently and test the direction. After determining the direction, start the lateral operation, turn around and walk on both sides of the array until the array is covered, and select the end point according to the parking mode.
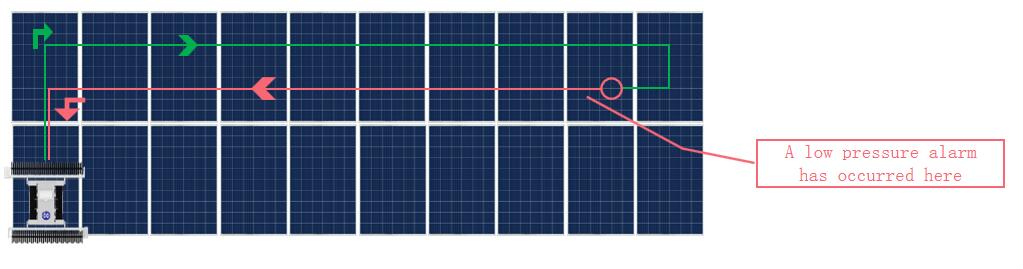
2.4.2Low pressure return
When the battery power is low during autonomous operation, the device will automatically enter the low-voltage return-to-home mode and return to the starting position.
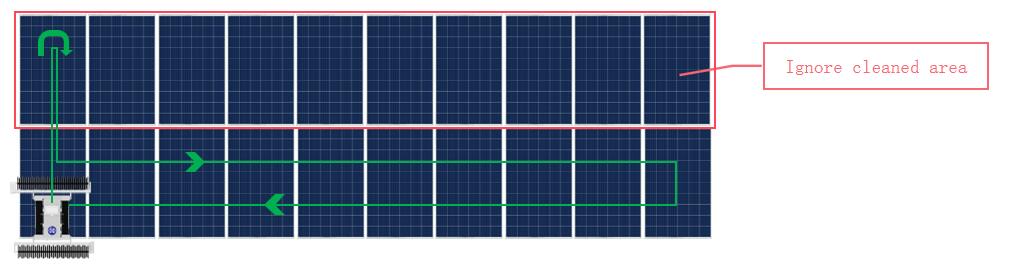
2.4.3Breakpoint Continuation
Choose to skip part of the cleaned area independently, find the position where the last low pressure return or manual button interrupted the operation, and start to continue the operation from there.
Notice:
2.5.1Basic interaction
Device status display and mode customization settings.
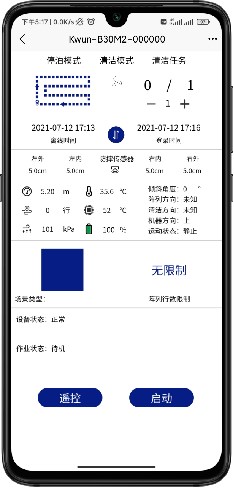
2.5.2Remote control mode
Joystick and button mode for manual control of the device
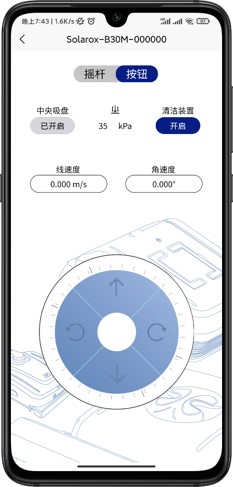
* The remote control mode is a headed mode with the device itself as the reference coordinate system.
* instead of headless mode with a geographic or operator referenced coordinate system.
Categories
New Blog
For inquiries about our products or pricelist, please leave to us and we will be in touch within 24 hours.
 RM502, Sihai Smart Zone, No.189, Fanghu West Road, Huli District, Xiamen, Fujian, China.


© Copyright: 2026 Xiamen Wintop New Energy Tech Co., Ltd.. All Rights Reserved.

IPv6 network supported
Friendly Links:
Integrated Solar System