Adjustable Solar Mounting System
Blog

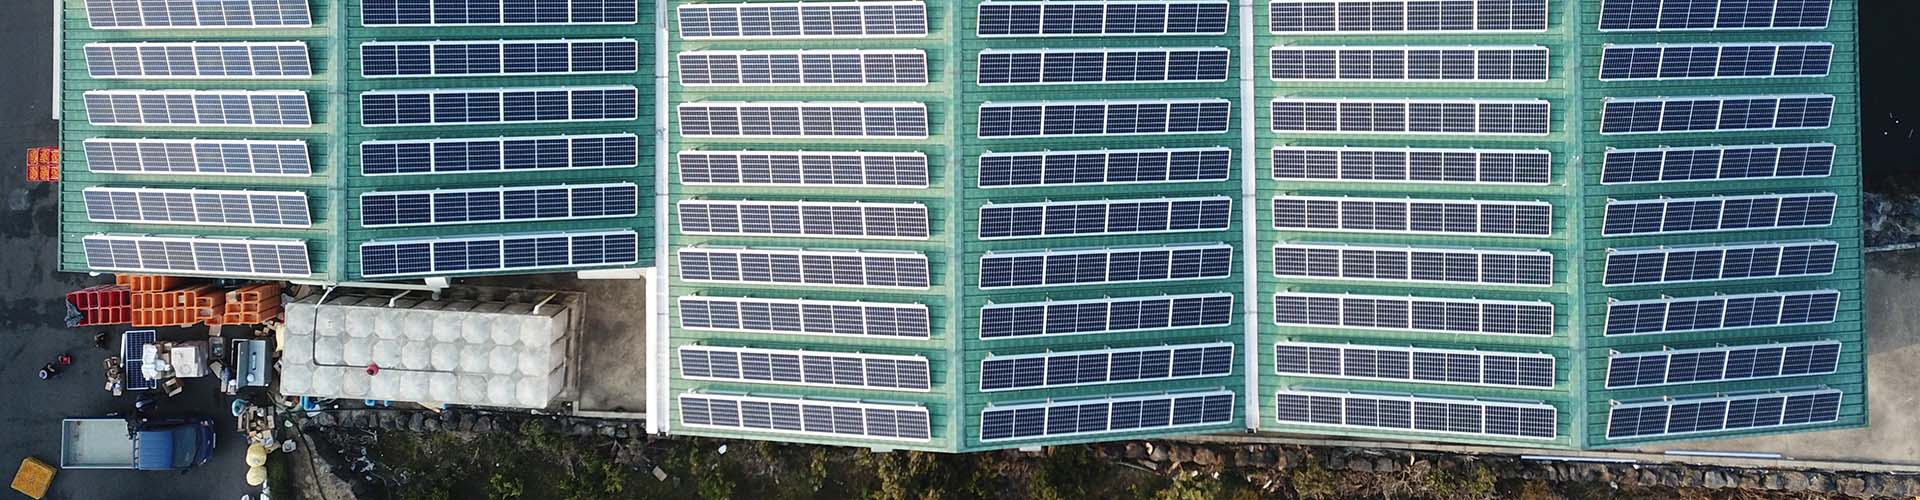
How to install metal roof L-foot solar racking system?

  • 2022-11-07 17:10:17
Wintop Metal Roof Solar Racking System is developed to fit all types of L feets in solar roof mounting projects. Fasteners are uniquely designed to mo r e easier and quicker installation with the use of simple tools. 
Before the construction, please read our installation instructions carefully.This manual can provide you with different specifications for the construction of battery board. 

Our company is fully based on the Australian AS/NZS1170.2 standard in the design of the product structure. When installing on roof, you must obey the local safety standards, and pay attention to the relevant regulations in your area. You can download the latest installation manual at our website www.xmwintop.com.

1.Preparing for installation

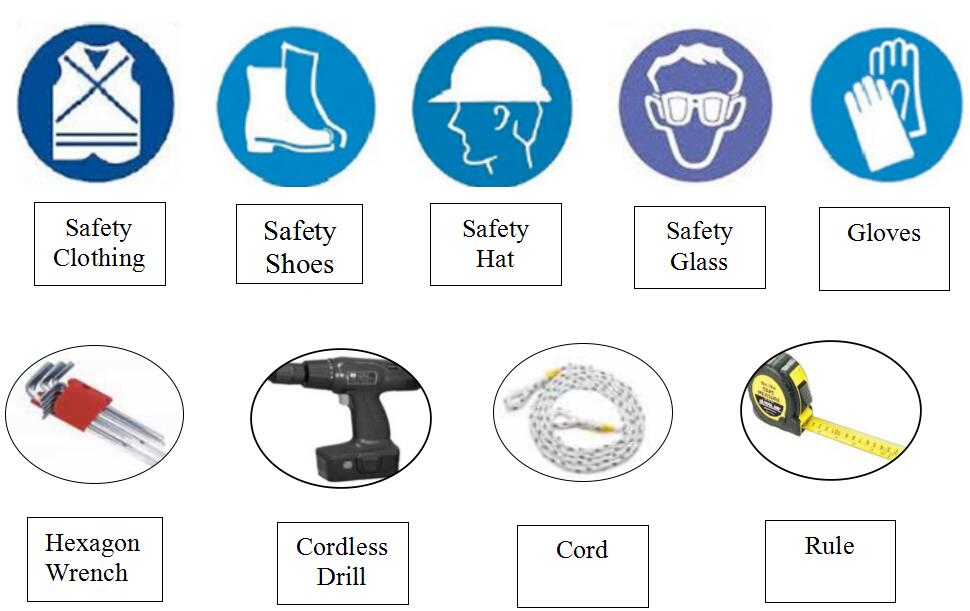
The components are as follows:


There are 3 different types of L-feet set with screws,and you can choose anyone:
1 L-feet+Wooden Screw
2 L-feet+Self-taping Screw

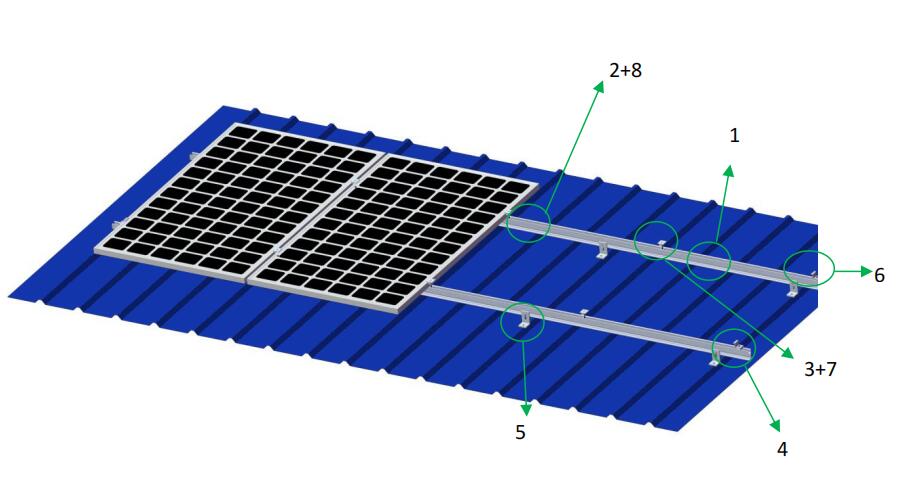
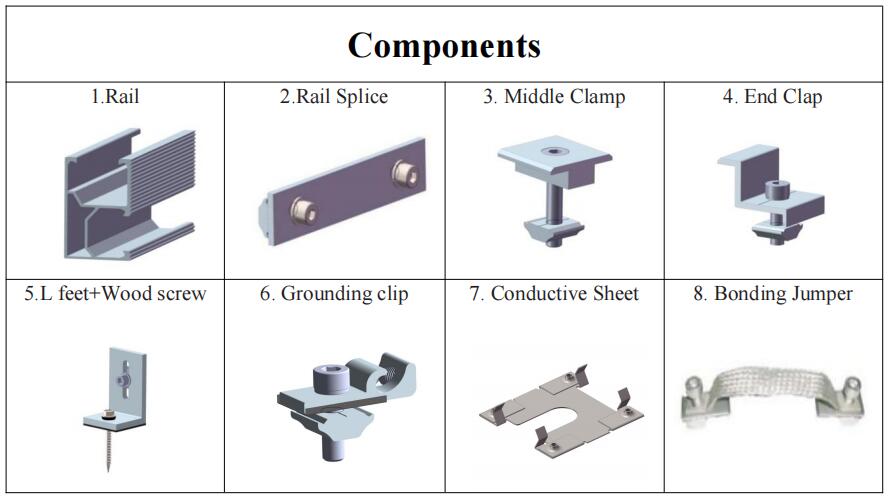
3 L-feet+Hanger Bolt


The instruction as below refers to L feet+Wooden screw


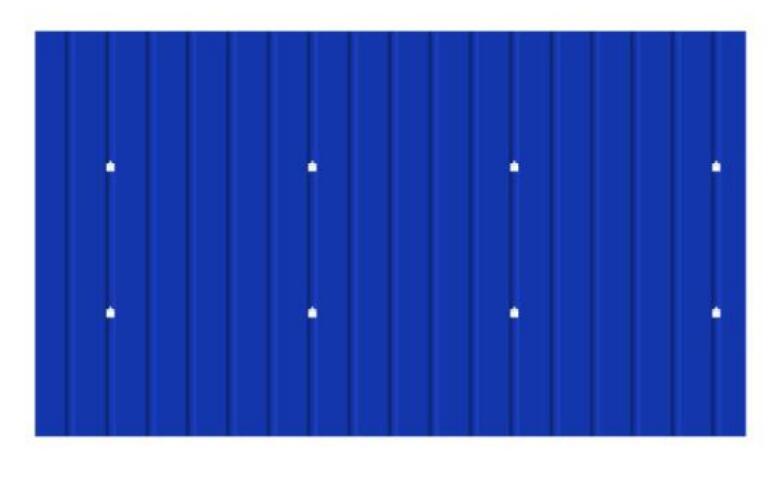
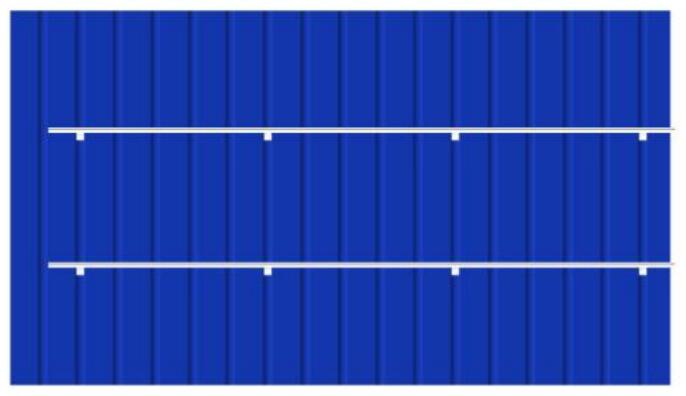
2.Planning the Installation Area


1. The layout of solar panels is according to the plan diagram.
2. The spacing between solar panels: 17mm.
3. Horizontal spacing between Standard L feet Hooks:
4. Vertical spacing between Standard L feet Hooks≈1/2 or 3/4 of panel length.
Notes:
Spacing between panels should be adjusted narrower when system is
exposed in wind, placed on roof edge or in the corner.


3.Installation steps


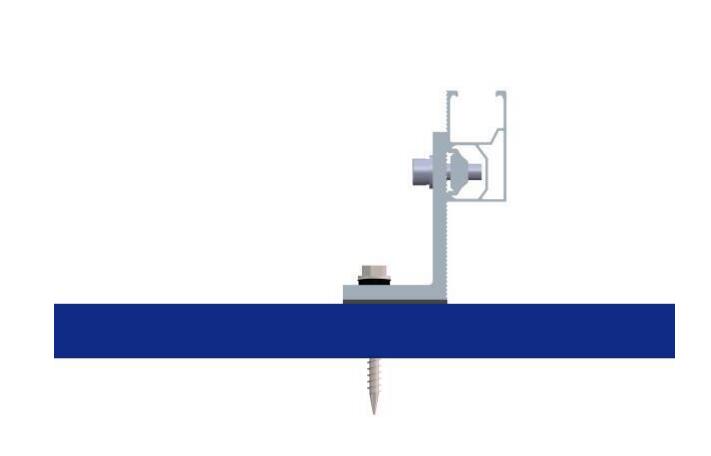
(1)Installation of Standard L-Feet Hook


According to the installation plan, The L-Feet is mounted on metal roof with a Wooden screw as the picture shows.


As the picture shows,when all L-feet installation finished,it should be like this.


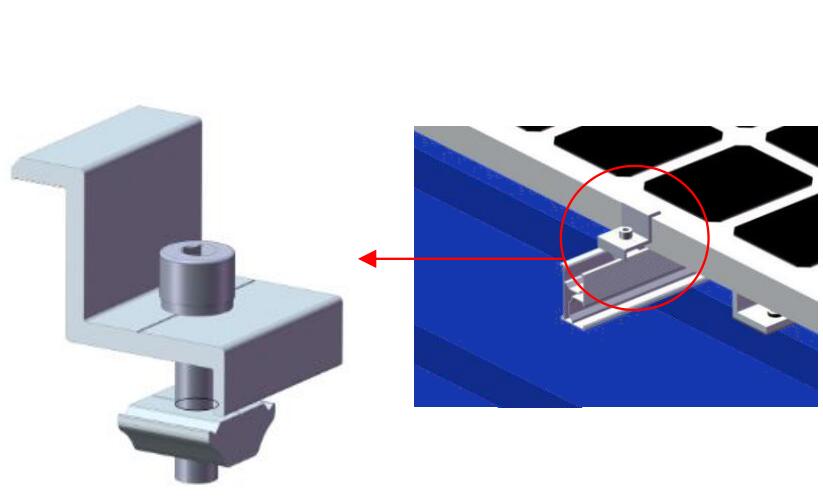
(2)Installation of Rail and Rail Splice

For rails with different lengths,start from the shortest one.If you need, to connect multiple rails together.Slide the rail splices into the rear side of the pre-assembled rails halfway to the side. Fasten the first M8 bolt firmly using the Allen key. Now slide the next rail segment into the splice.


Position the WT nut in the groove of the rail and gently screw in the bolt for 2 to 3 turns. Slide the bolt to the final position to fix the middle clamp, end clamp or L feet hook, then lock the bolt tightly.


(3)Installation of Rail and L-feet
Fix rails onto the L feet hook with wooden screw,M8 hexagon socket head bolt, flat washer, spring washer and WT nut. (Do not fasten the bolts too tight in advance, with 2 to 3 screw threads left.)

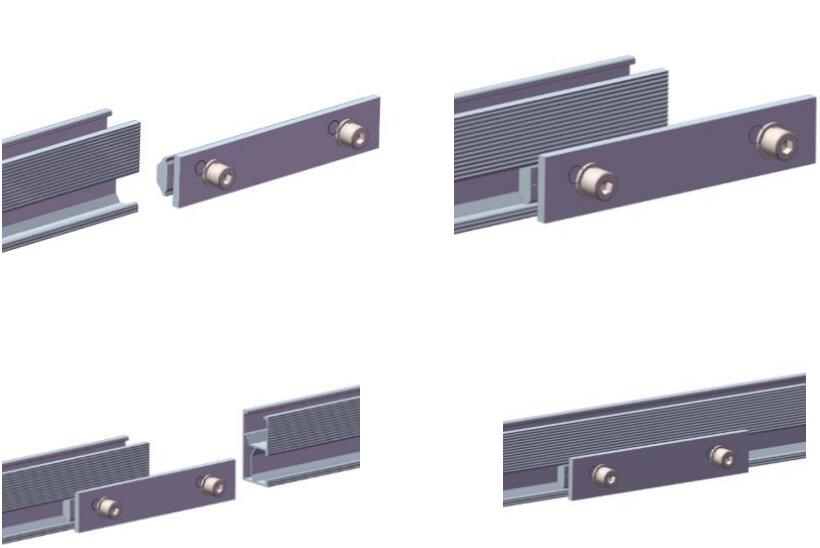
Position each rail by a rope and pre-fix it to L-feet hook. Then lock all the bolts tightly with inner hexagon spanner.

(4)Installation of solar panels
According to the plan, place the PV Panel on the rail, slip the End Clamp to tightly stick on the solar panel, and lock the bolt tightly.


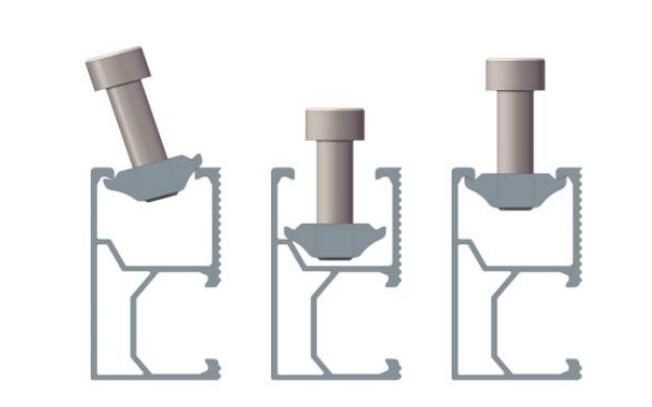
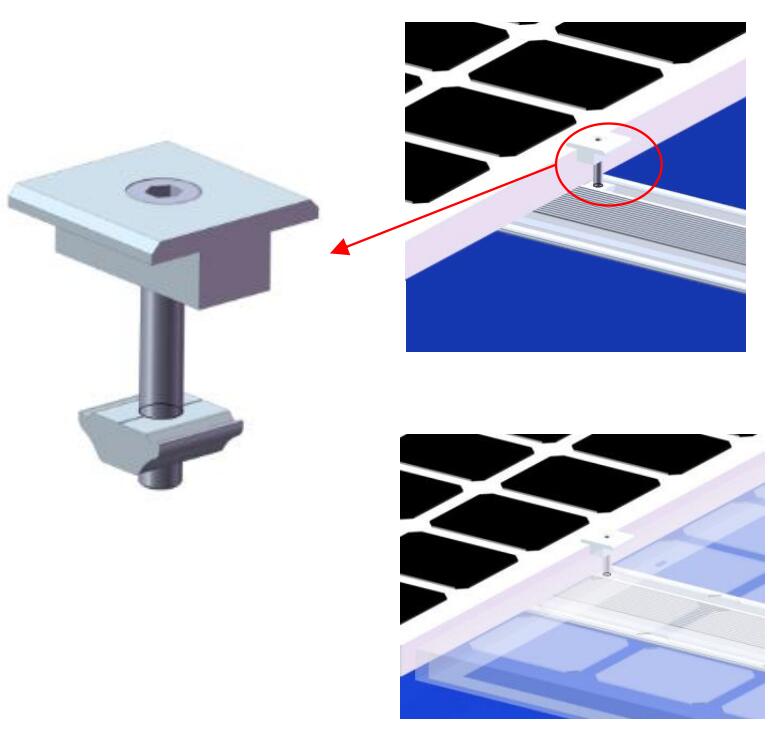
Place the Middle Clamp into the rail and tightly stick on the edge of solar module. Then pre-lock the bolt (Bolt down around 2 to 3 screw threads).


(5)Installation the Grounding System
Wintop grounding system has the special solution to lead the electron accumulated in the module to the ground. The ground clips with special ribs is installed between two panels and lead the elect ron from modules to the rail. Then the ground lugs connect the rails to the ground by the copper wire. It will be acycle to keep the PV array safe.


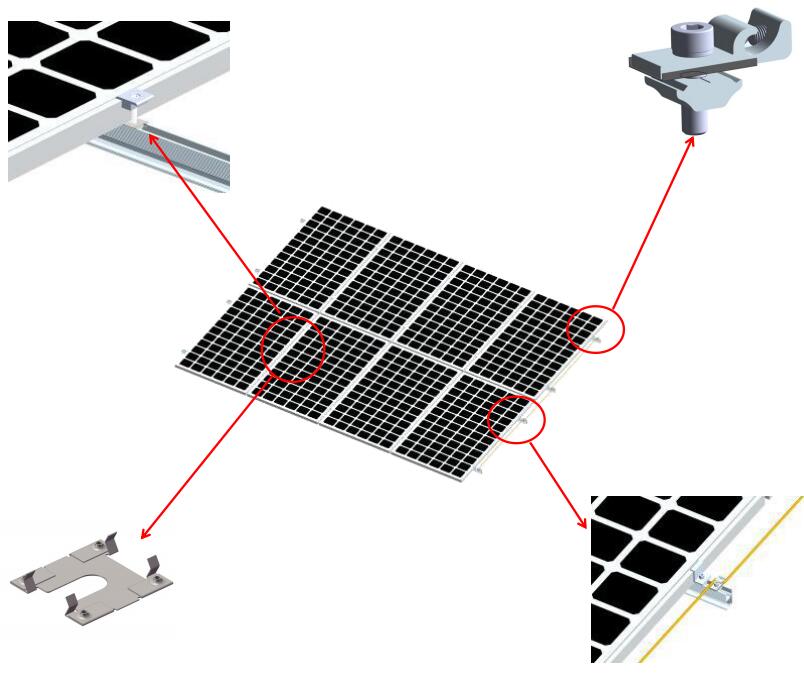
So far, the solar metal roof rack system has been installed.


© Copyright: 2024 Xiamen Wintop New Energy Tech Co., Ltd.. All Rights Reserved.

IPv6 network supported

IPv6 network supported

top

Leave A Message

Leave A Message

    If you have questions or suggestions,please leave us a message,we will reply you as soon as we can!

  • #
  • #
  • #