English


 Ground Mounting System
 Roof Mounting System
 Carport Mounting System
 Farm Mounting System
 Easy Solar Kit
 Solar Tracking System
 Solar Inverter
 Solar Accessories
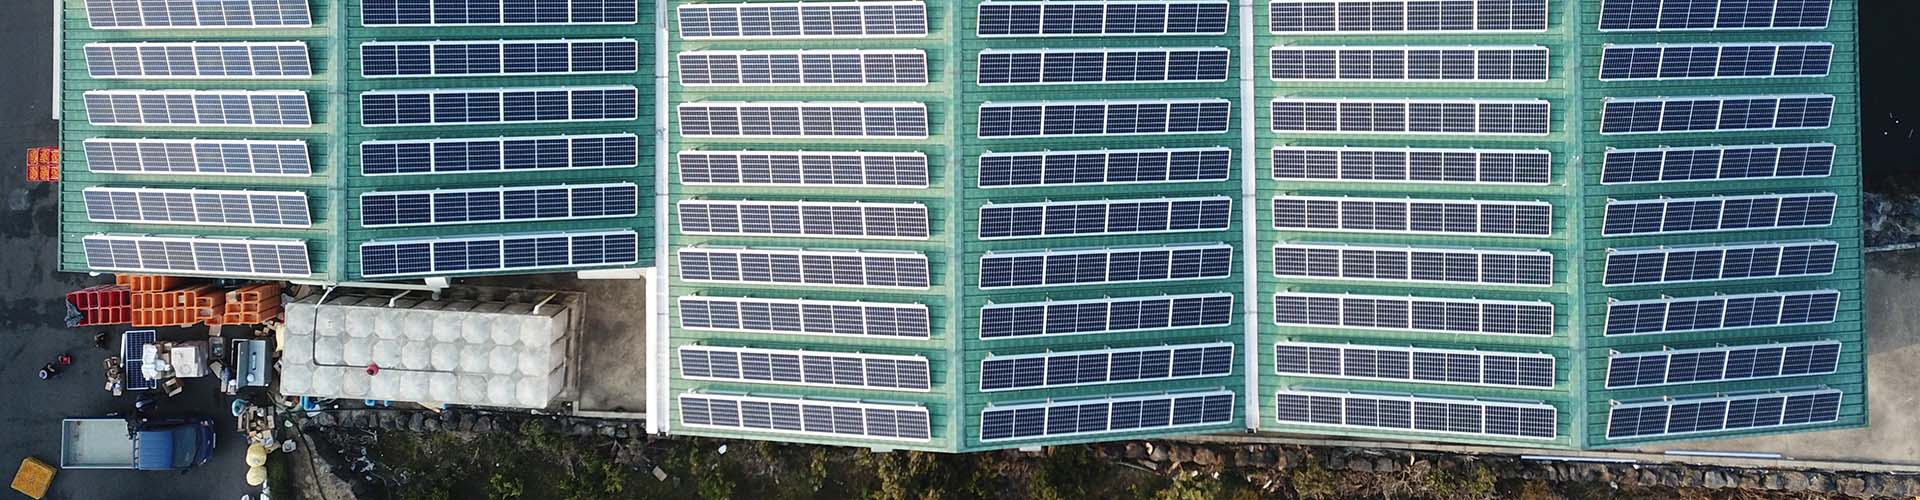
Installation Manual for Solar Farm
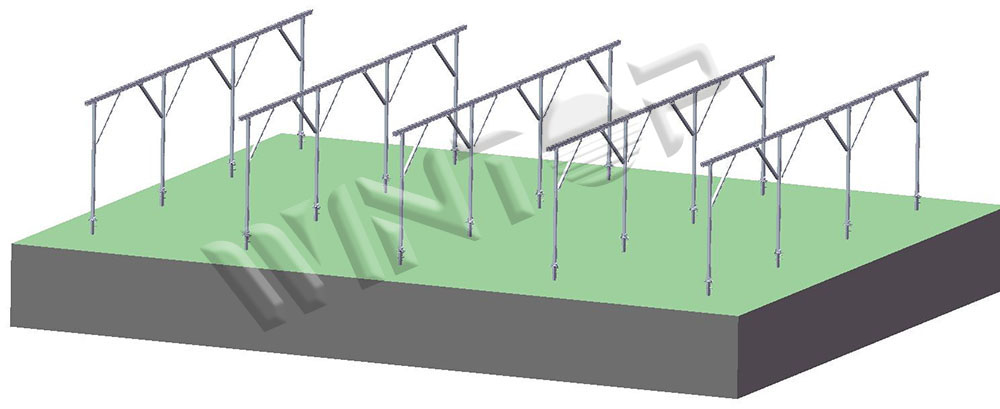
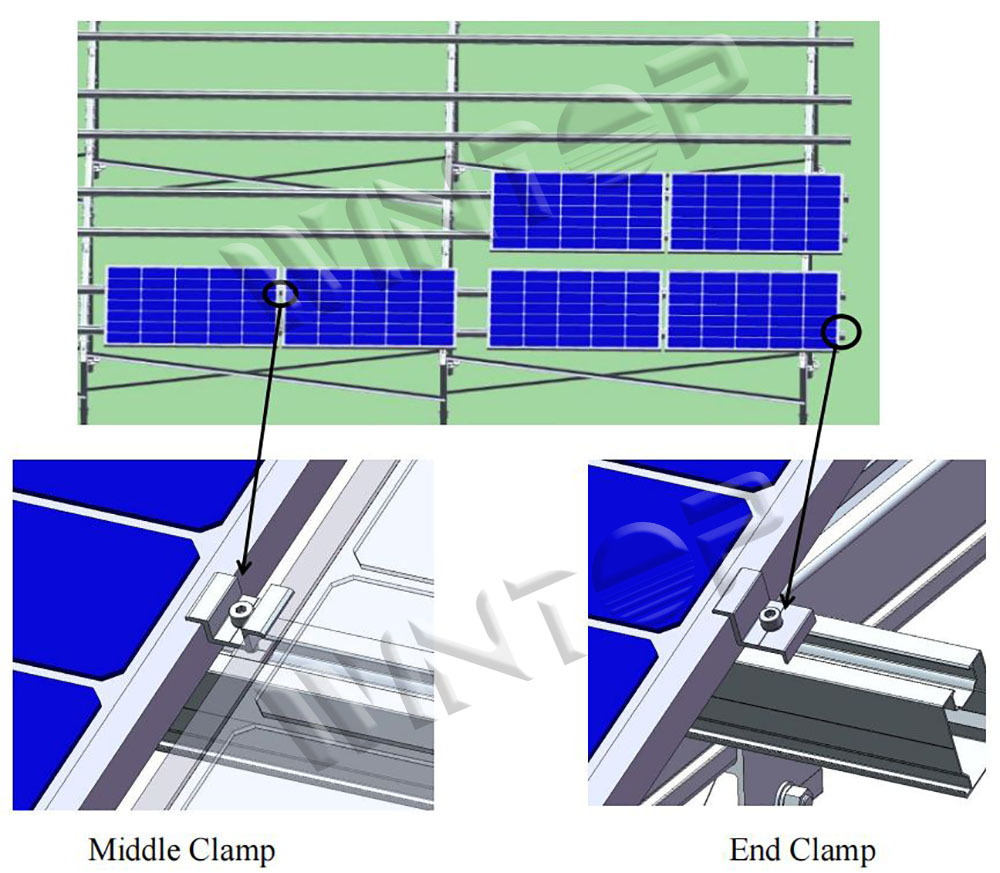
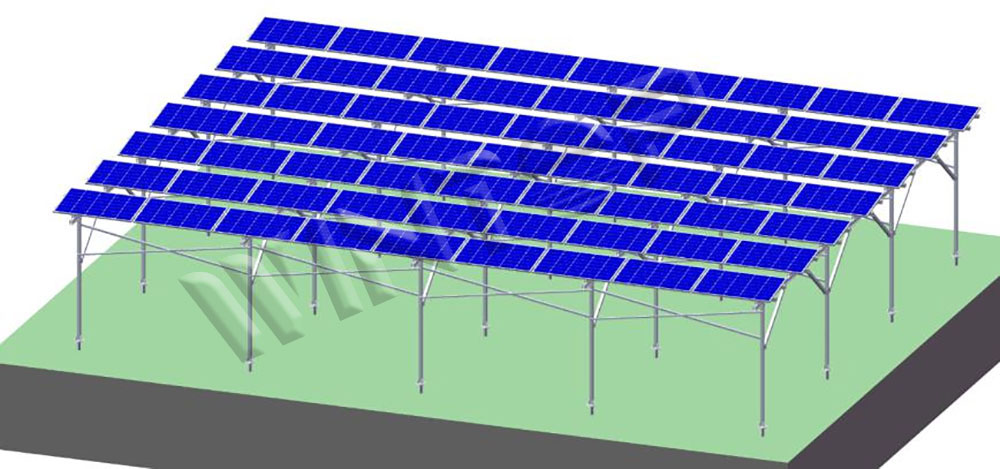
Wintop Agricultural Greenhouse Solar PV Ground Mounting System is mainly applied to the installation of agricultural solar PV farms, achieving the dual-use of lands. According to the varied solar module arrays, the light exposure requirement of plant and the dimension of farming machines, Wintop will design a suitable solar mounting system solution with highly pre-assembled structure to guarantee easy and quick installation.
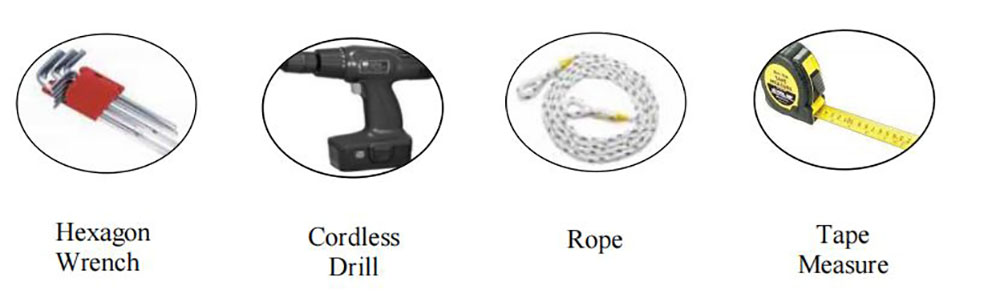
2.Installation Tools

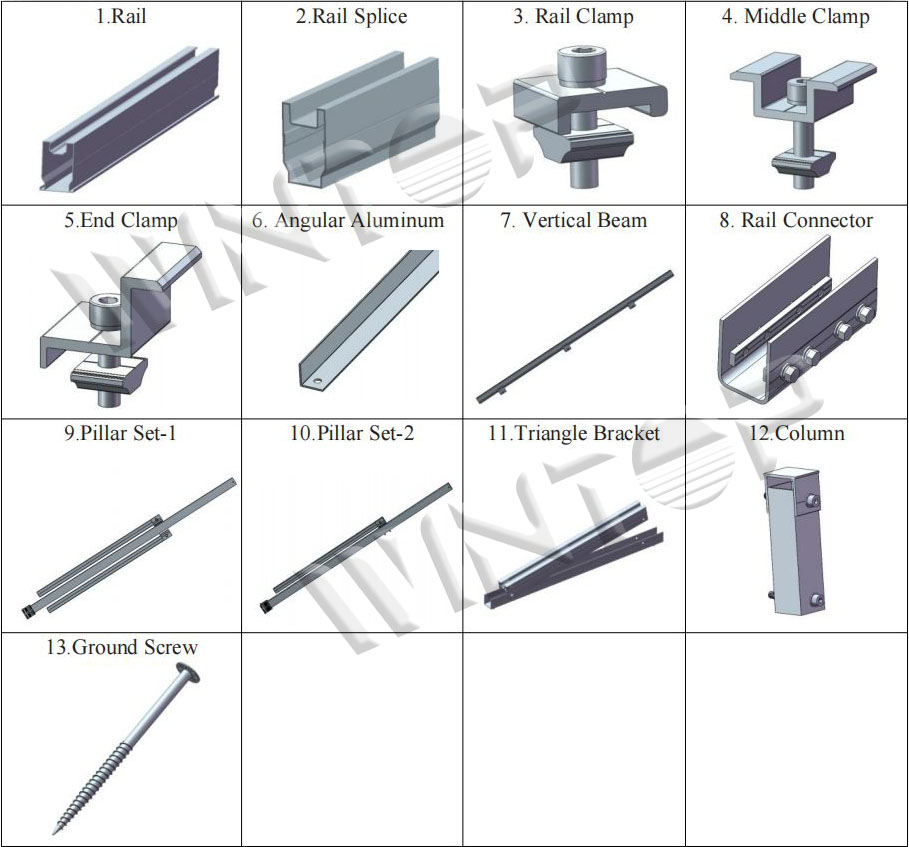
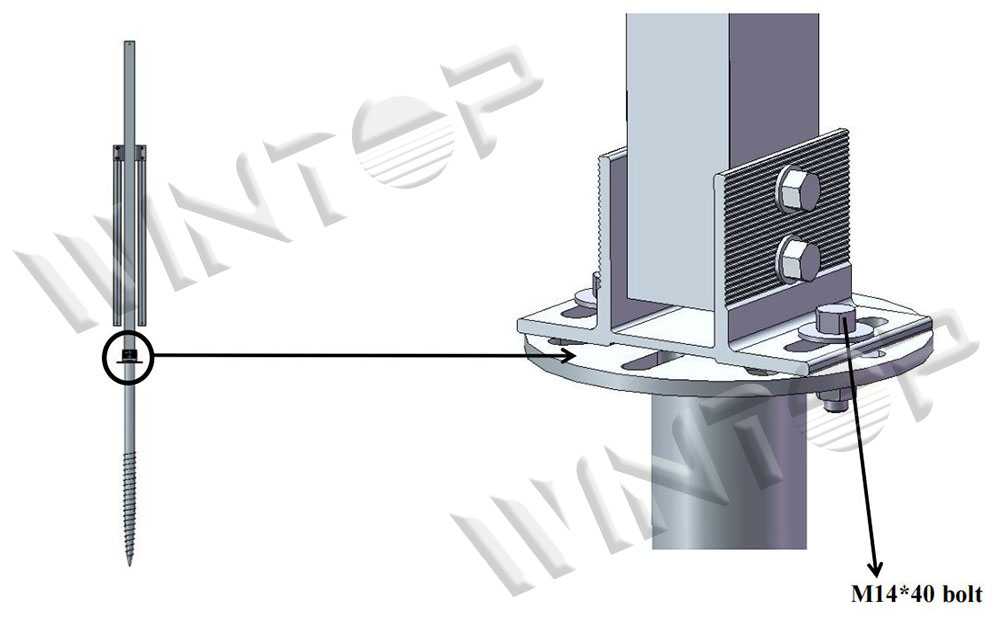

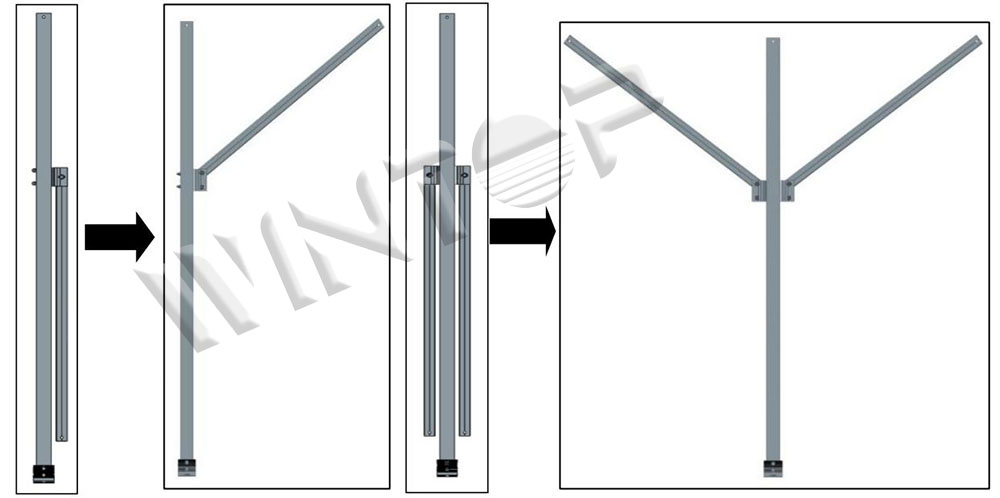
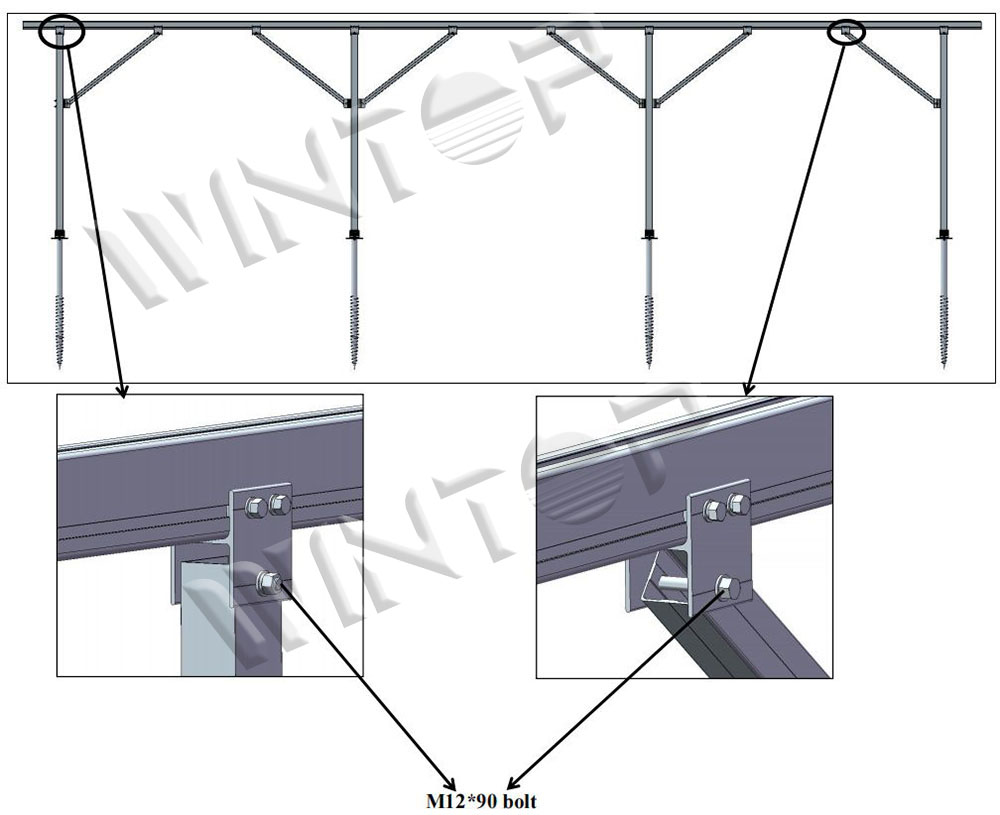
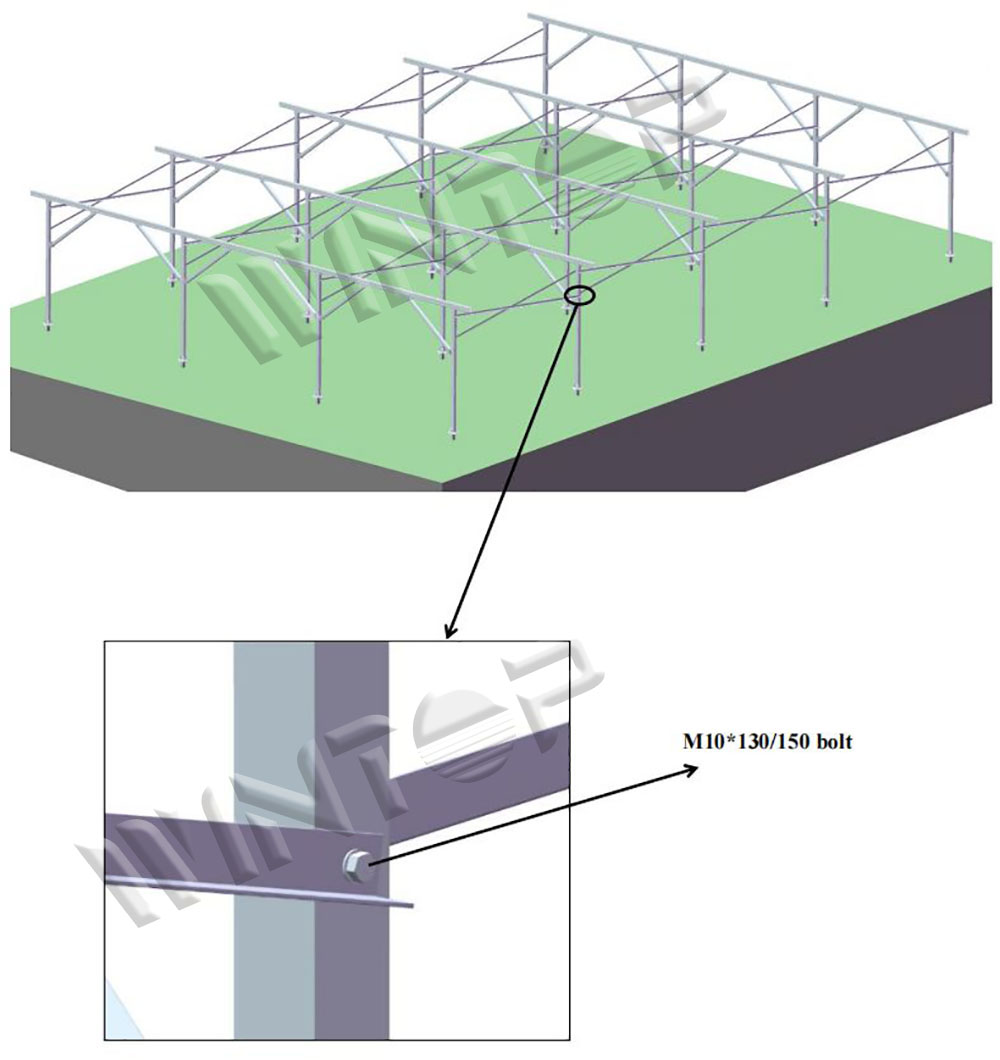
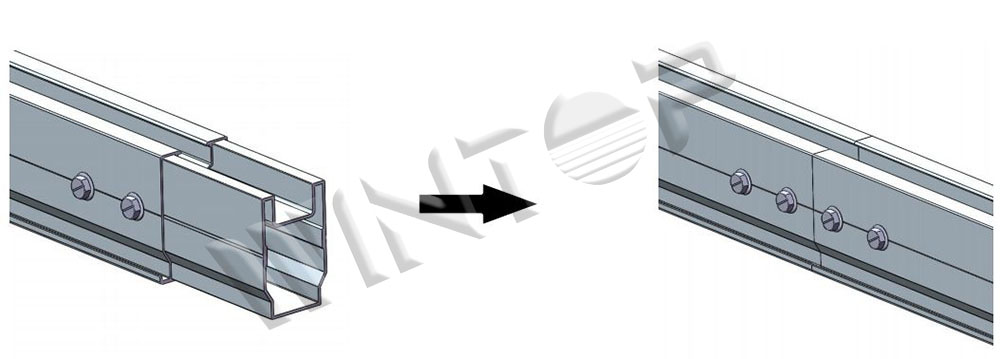
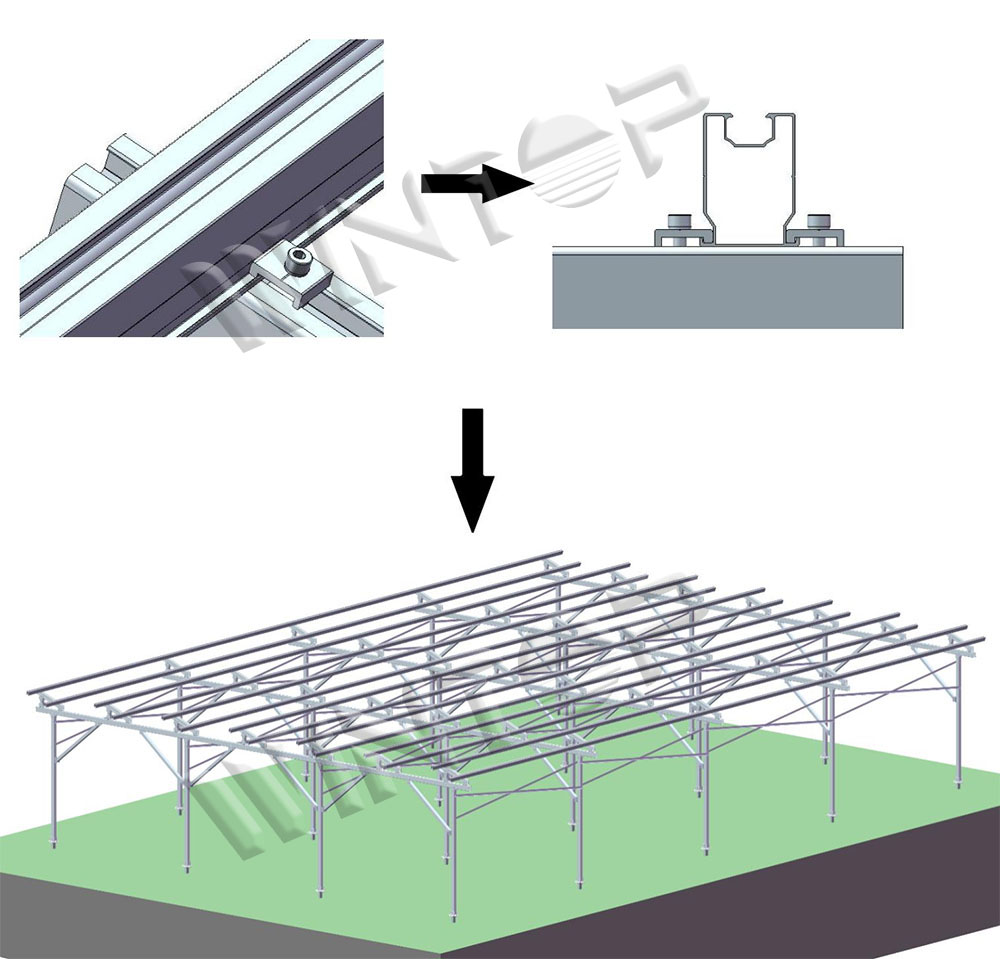
Unfold the pillar set and fix it on the corresponding H-shaped fitting with M12*90 bolt sets as the picture shows.
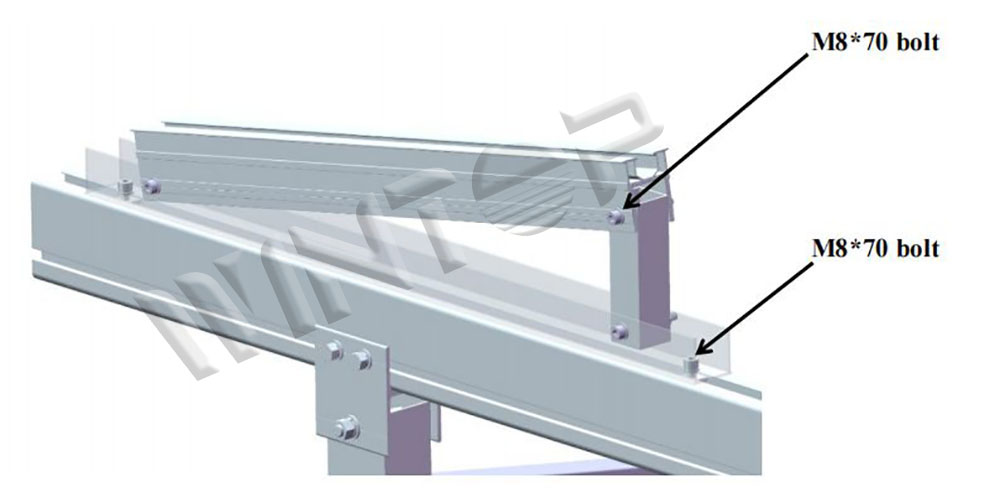
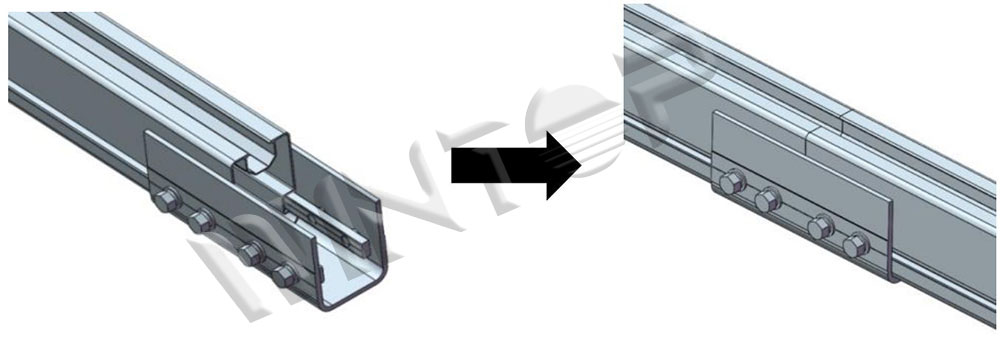
Note: before mounting the triangle bracket,please tighten this bolt
5. Warranty
10 Year Limited Product Warranty, 15 Year After Sales Service
Xiamen Wintop New Energy Tech. Co., Ltd warrants to the original purchaser of produc ts that the Product with Oxidation treatment on surface shall be free from shedding and c racks for a period of 5 years. Additionally,Xiamen Wintop New Energy Tech. Co., Ltd. provides 10 years of quality assurance.
Categories
New Blog
For inquiries about our products or pricelist, please leave to us and we will be in touch within 24 hours.
 RM502, Sihai Smart Zone, No.189, Fanghu West Road, Huli District, Xiamen, Fujian, China.


© Copyright: 2026 Xiamen Wintop New Energy Tech Co., Ltd.. All Rights Reserved.

IPv6 network supported